Reactively storing and retrieving URL state in Angular
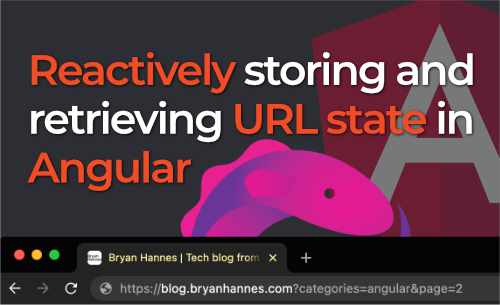
In this article, we’ll explore different techniques you can use to store state in the URL, including query parameters and route parameters. We also build an application that saves search filters in the URL. By the end of this article, you’ll have a good understanding of how to implement URL state management reactively in Angular.
Storing state in the URL can improve the user experience of an application because it allows the state to be preserved when the page is refreshed, bookmarked, or shared.
But we don’t want to save all types of state to the URL, some type of state is more suitable to save to the URL than others. Some state that is perfect to store in the URL is:
- Filters
- Sort criteria
- Page numbers
- Ids (for detail pages)
Types of states in the URL
There are 3 types of states in the URL
- Query parameters
- Route parameters
- Fragment
Query parameters
Query parameters are key-value pairs that are added to the end of the URL after a ? character and every parameter is
added after this in a key=value format, separated by a &.
https://blog.bryanhannes.com?category=angular&page=2
Route parameters
Route parameters are mostly used to identify a specific resource. A route parameter is part of the URL and it is not per
se added to the end of the URL.
They have a :key syntax.
https://blog.bryanhannes.com/products/:productId
So in this example, angular is the productId.
https://blog.bryanhannes.com/products/angular
Fragment
A fragment is a named section within an HTML document, specified in a URL by the # character followed by a unique
name.
The car catalog application
We are going to build a simple car catalog application in Angular 15 with standalone components where we can search for cars. The search filters will be stored in the URL as query parameters.
This is what the application looks like:
We use the app.component as the container or smart component. If we have a look at the template we notice that there
are 2 UI components: SearchFilterComponent and SearchResultsComponent.
<!-- app.component.html -->

<ng-container *ngIf="vm$ | async as vm">
    <h1>Car catalog</h1>

    <app-search-filter
            [name]="vm.name"
            [brand]="vm.brand"
            [color]="vm.color"
            (filterChanged)="filterChanged($event)"
    ></app-search-filter>

    <button type="button" (click)="clear()">Clear</button>

    <app-search-results [cars]="vm.results"></app-search-results>
</ng-container>
First, let’s see what the SearchFilterComponent and SearchResultsComponent look like.
SearchFilterComponent
The search filter component renders the filters: name, brand and color.
When one of the filters is changed, the filterChanged event is emitted with the new filter value.
The component takes in three inputs (name, brand and color) which are used to set the value of the input (name)
and selects (brand and color).
<!-- search-filter.component.html -->

<div class="filter">
    <label for="name">Name:</label>
    <input type="text" id="name" [ngModel]="name" (keyup)="updateName($event)"/>
</div>

<div class="filter">
    <label for="brand">Brand:</label>
    <select
            name="brand"
            id="brand"
            [ngModel]="brand"
            (ngModelChange)="updateBrand($event)">
        <option [ngValue]="null"></option>
        <option value="Toyota">Toyota</option>
        <option value="Ford">Ford</option>
        <option value="Volkswagen">Volkswagen</option>
    </select>
</div>

<div class="filter">
    <label for="name">Color:</label>

    <select
            name="color"
            id="color"
            [ngModel]="color"
            (ngModelChange)="updateColor($event)">
        <option [ngValue]="null"></option>
        <option value="black">Black</option>
        <option value="blue">Blue</option>
        <option value="red">Red</option>
        <option value="green">Green</option>
    </select>
</div>
// search-filter.component.ts

@Component({...})
export class SearchFilterComponent {
    @Input() public name?: string;
    @Input() public brand?: string;
    @Input() public color?: string;

    @Output() public readonly filterChanged = new EventEmitter<CarFilter>();

    public updateName(event: KeyboardEvent): void {
        let value = (event.target as HTMLInputElement).value;

        if (value === '') {
            value = null;
        }

        this.filterChanged.emit({name: value});
    }

    public updateBrand(value: string): void {
        this.filterChanged.emit({brand: value});
    }

    public updateColor(value: string): void {
        this.filterChanged.emit({color: value});
    }
}
SearchResultsComponent
The searchResultsComponent renders the table of cars, this component has one input called cars.
<!-- search-results.component.html -->

<table>
    <thead>
    <tr>
        <th>Name</th>
        <th>Brand</th>
        <th>Color</th>
    </tr>
    </thead>

    <tbody>
    <tr *ngFor="let car of cars">
        <td></td>
        <td></td>
        <td></td>
    </tr>
    <tr *ngIf="cars?.length === 0">
        <td colspan="3">No cars found</td>
    </tr>
    </tbody>
</table>
// search-results.component.ts

@Component({...})
export class SearchResultsComponent {
    @Input() public cars: Car[] = [];
}
AppComponent
The AppComponent is the place where the most interesting stuff will happen:
- Retrieve the query parameters with
ActivatedRoute - Automatically fetch the cars from the API via the
CarServicewhen the filters change - ViewModel to show/pass data in the template
Retrieving the query parameters
The first thing we have to do in the AppComponent is to retrieve the query parameters from the URL and map the Params
to a CarFilter.
We can use the ActivatedRoute service to retrieve the query parameters from the current URL. We can transform
the Params to a CarFilter with the help of the map RxJS operator.
activatedRoute = inject(ActivatedRoute);

queryParams$: Observable < CarFilter > = this.activatedRoute.queryParams.pipe(
    map((params) => ({
        name: params.name,
        brand: params.brand,
        color: params.color,
    }))
);
To ensure that the search results are automatically updated whenever the query parameters change, we can use the pipe
and switchMap operators on the queryParams$ observable. The switchMap operator is used because it allows us to
return another observable (in this case, the observable of search results returned by the carService.findCars()
method).
carService = inject(CarService);

results$: Observable < Car[] > = this.queryParams$.pipe(
    switchMap((carFilter: CarFilter) => {
        return this.carService.findCars(carFilter);
    })
);
To use both the search results (results$) and the search filters (queryParams$) in the template, we can create
a ViewModel
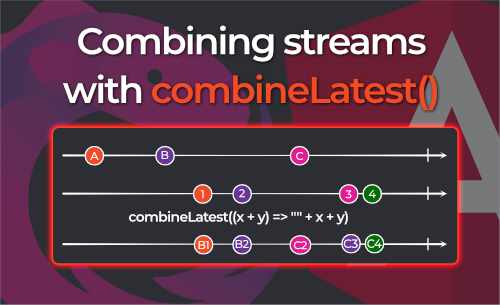
that combineLatest with both observables.
Using the map operator, we can transform the array of params and result into a PageViewModel object.
interface PageViewModel {
    name: string;
    brand: string;
    color: string;
    results: Car[];
}

vm$: Observable < PageViewModel > = combineLatest([
    this.queryParams$,
    this.results$,
]).pipe(
    map(([params, results]) => ({
        name: params.name,
        brand: params.brand,
        color: params.color,
        results,
    }))
);
Thanks to the vm$ View Model we have only 1 async pipe in the template and so only 1 subscription. It also makes the
template a lot cleaner.
<!-- app.component.html -->

<ng-container *ngIf="vm$ | async as vm">
    <h1>Car catalog</h1>

    <app-search-filter
            [name]="vm.name"
            [brand]="vm.brand"
            [color]="vm.color"
            (filterChanged)="filterChanged($event)"
    ></app-search-filter>

    <button type="button" (click)="clear()">Clear</button>

    <app-search-results [cars]="vm.results"></app-search-results>
</ng-container>
The last thing we need to do in the AppComponent is, add the filters (name, brand and name) to the URL as query
parameters whenever the filters change. Luckily we have defined an @Output() in the SearchFilterComponent which
emits whenever the filters change.
To update the query parameters of the current route without navigating to a new route, we can use the Router service
and pass an empty array as the first parameter. The property queryParamsHandling: 'merge' allows us to merge the new
query parameters with the existing ones.
  public
filterChanged(filter
:
CarFilter
):
void {
    this.router.navigate([], {
        queryParams: filter,
        queryParamsHandling: 'merge',
    });
}
Our final AppComponent looks like this:
// app.component.ts

interface PageViewModel {
    name: string;
    brand: string;
    color: string;
    results: Car[];
}

@Component({...})
export class AppComponent {
    private readonly activatedRoute = inject(ActivatedRoute);
    private readonly router = inject(Router);
    private readonly carService = inject(CarService);

    // Source
    private readonly queryParams$: Observable<CarFilter> =
        this.activatedRoute.queryParams.pipe(
            map((params: Params) => ({
                name: params.name,
                brand: params.brand,
                color: params.color,
            }))
        );

    // Intermediate
    private readonly results$: Observable<Car[]> = this.queryParams$.pipe(
        switchMap((carFilter: CarFilter) => {
            return this.carService.findCars(carFilter);
        })
    );

    // Presentation
    public readonly vm$: Observable<PageViewModel> = combineLatest([
        this.queryParams$,
        this.results$,
    ]).pipe(
        map(([params, results]) => ({
            name: params.name,
            brand: params.brand,
            color: params.color,
            results,
        }))
    );

    // We are using queryParamsHandling: 'merge', because we want to merge all query parameters
    // Let's say brand is already selected then our URL looks like this:
    // example.com?brand=ford
    // When we select a color we want to add the color (merge) to the already existing query parameters
    // example.com?brand=ford&color=red
    // If we don't set queryParamsHandling to 'merge' then the latest filter will override the previous one and will there be only one query parameter
    public filterChanged(filter: CarFilter): void {
        this.router.navigate([], {
            queryParams: filter,
            queryParamsHandling: 'merge',
        });
    }

    public clear(): void {
        this.router.navigate([]);
    }
}
Conclusion
- Now we know the different techniques for storing state in the URL: query parameters, route parameters and fragments.
- To subscribe to changes in query parameters, we can use the
ActivatedRouteservice. - We can use the
queryParamsHandlingproperty to specify how theRoutershould merge new query parameters with the existing ones when navigating to a new route. By settingqueryParamsHandling: 'merge', we can merge the new query parameters with the existing ones. - We saw how the
ViewModelapproach makes our templates cleaner.
Here you check out the full Stackblitz demo:
Special thanks to the reviewers:
Other articles you might like
-

Generating icon components from SVG files with NX and Angular
-

Angular + NGINX + Docker
-

How to Call the OpenAI API Directly from Angular (with streaming)
-
Custom TitleStrategy in Angular
-
RxJS catchError: error handling
-
RxJS distinctUntilChanged: filtering out duplicate emissions
-
RxJS combineLatest: how it works and how you can use it in Angular
-
Delaying streams with RxJS debounceTime
-
Real-life use cases for RxJS SwitchMap in Angular
-
Transforming data with the RxJS Map operator
-

Typesafe view models with RxJS and Angular
-
Let's build an Image Generator with OpenAI and Angular
-

Why you should externalize your Angular Configuration
 Written by Bryan Hannes